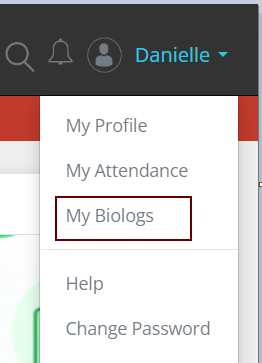
This module is the rebranded version of My Biologs located under the avatar icon on the upper right corner of Sprout HR.

It is designed to provide a better user experience when it comes to viewing and exporting their own biometric logs. In the current enhancement, we are revamping the look and feel of the page as well as adding the capability to export the Attendance Logs to an Excel file.
We are continuously working on the enhancements for this module and later on, employees will also be able to view their attendance reports under the same module.
How To Search for My Attendance Logs for a Selected Date Range
Step 1: Navigate to the My Attendance Logs page via the “My Biologs” option from the user icon menu.

Step 2: Go to the Date From field and click on the icon (![]() ). A Date Picker will be displayed where you can select the day you want your search to start from. Alternatively, you can type the date in the field with a MM/DD/YYYY format.
). A Date Picker will be displayed where you can select the day you want your search to start from. Alternatively, you can type the date in the field with a MM/DD/YYYY format.
![]()
Step 3: Repeat the same step for the Date To field.
Step 4: The Search button.

Step 5: If there are logs from the selected date range, the Search Results List on the right side of the page will display the logs. The list highlights the total logs for the date range and the date of each log. By default, the first row is automatically expanded.

- To view the logs for the rest of the days, click each row individually or click the Expand All button at the top of the Search Result List.
- Click the row again to collapse it back, or Collapse All to collapse all records back.
Step 6: If your search result is more than 10 records, then you are able to access the rest of your logs by navigating through the page numbers at the bottom of the list. You can update how many logs you want to see per page by clicking a value in the Logs per page dropdown.

How To Export Attendance Logs for a Selected Date Range
Step 1: After completing a search for your attendance logs, click the “Export Logs” button at the bottom of the left-side panel. This will only be enabled when there is an actual result for the search.
After clicking the button, you’ll be redirected to the Exported Logs page where a message is displayed informing the file is in the progress of being created for download later.


Step 2: Once the file is ready to be downloaded, you’ll be notified with another message to check back again for your file. The duration of the export will depend on the volume of the logs and the resulting size of the file.

Step 3: The recently added export log will always be at the last part of the list of logs. To find the log, go to the last page of the list.


As a standard, the file is available for download until 3 days from its initial creation. This is to limit the number of files necessary to be stored, and keep your logs up-to-date with those you have recently exported. Once the expiry date is reached, you will now be unable to download the file.
Step 4: To download the file, hover on the export log and click the download icon on the far right side of the log, and lastly click the “Yes, Download File” button at the confirmation pop-up message.


If you have further questions, please feel free to reach out to us! We'd be glad to hear from you!
Comments
0 comments
Article is closed for comments.